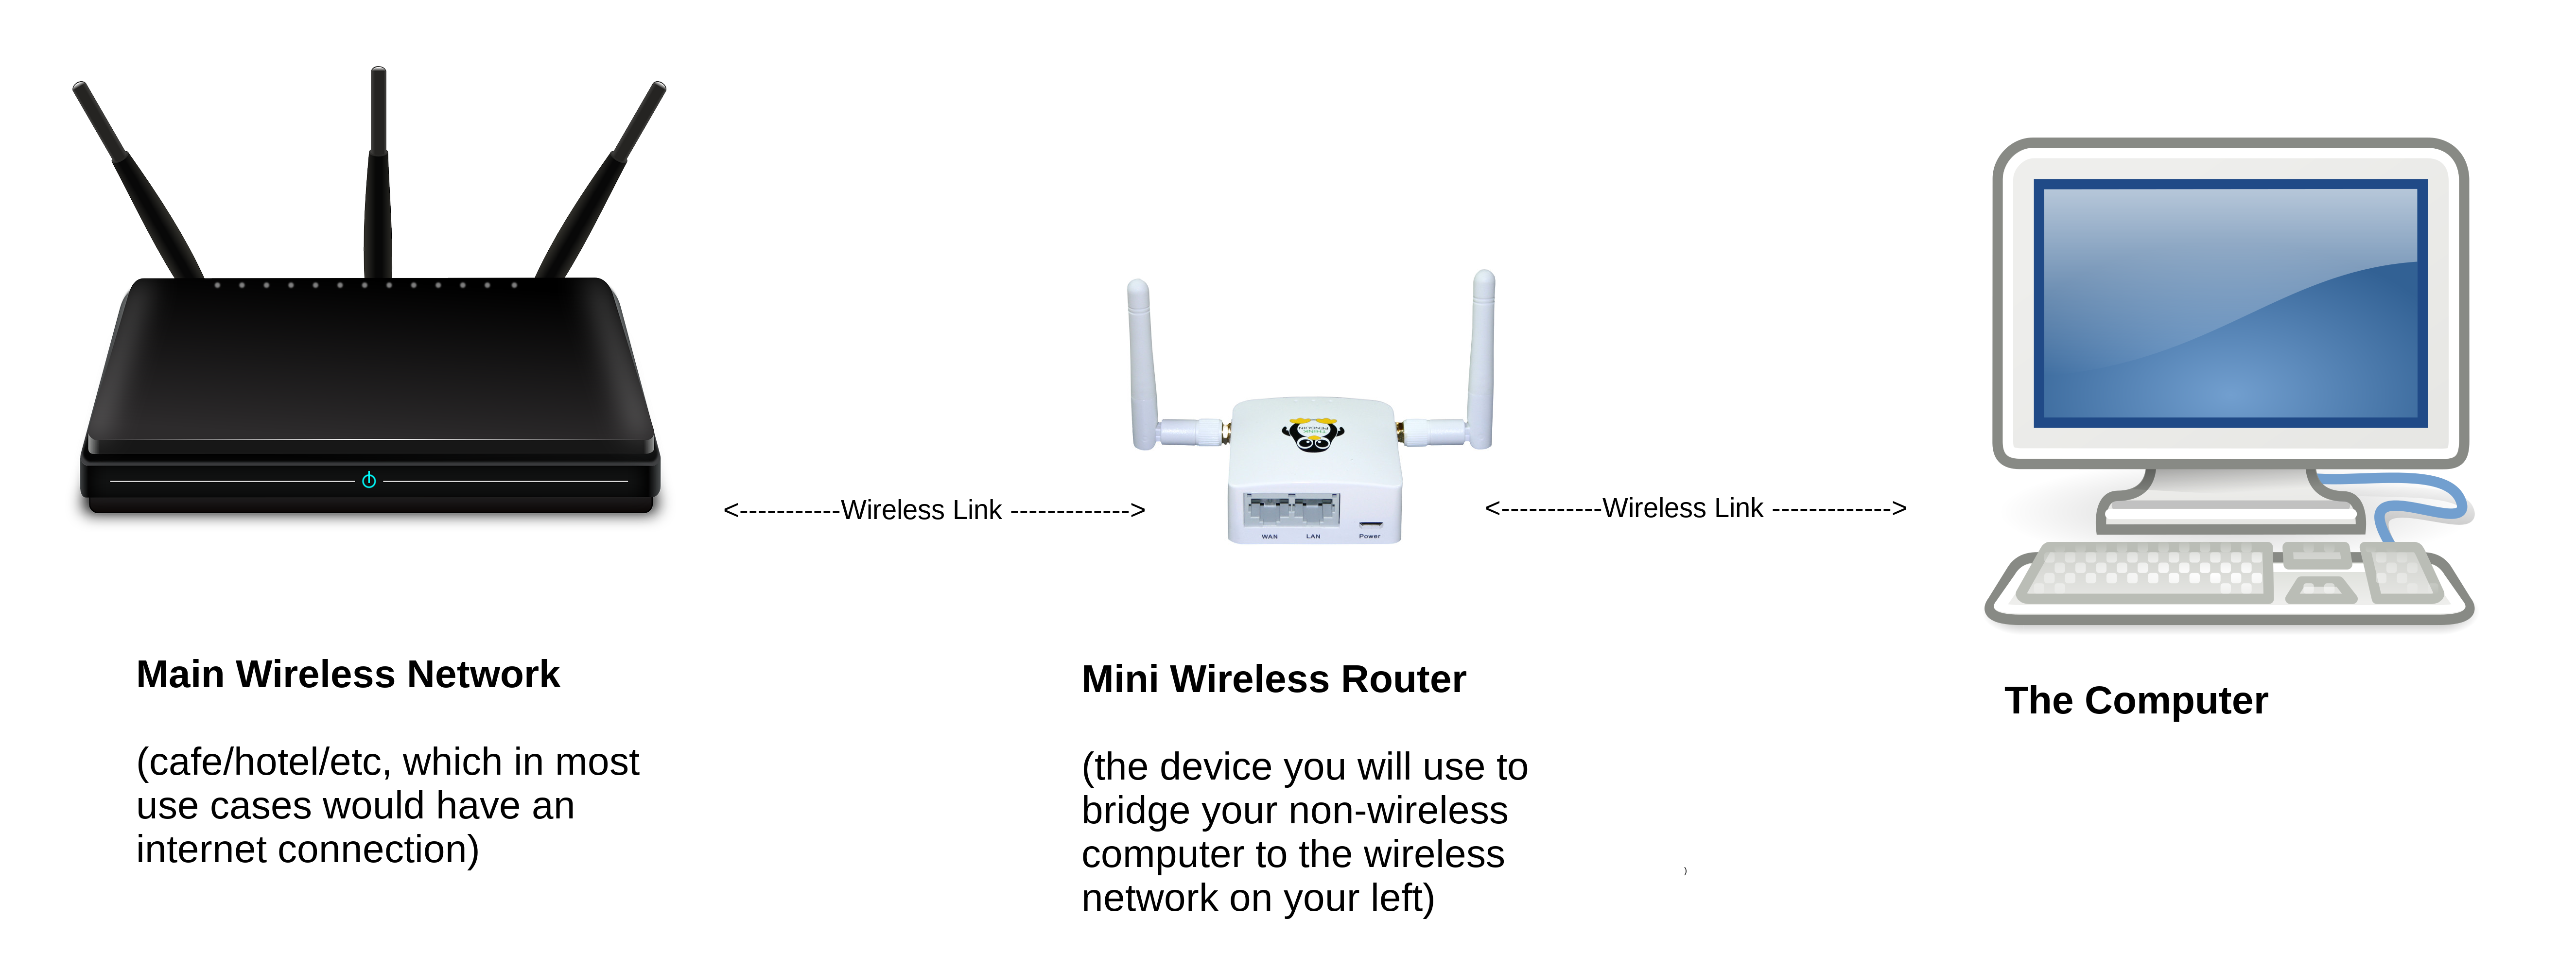
These instructions will enable you to utilize a TPE-R1300 wireless router as a wireless relay. When setup you will be able to connect computers to the TPE-R1300 wireless router and all traffic to it will be redirected to another upstream wireless router.
Do not connect an ethernet cable to the WAN port. The directions have been verified to work with older and newer releases of libreCMC, but the last release that was tested officially was libreCMC 1.5.14 on a TPE-R1300 mini wireless router. If you have any questions or think an update is needed contact support.
Directions
0. Connect the power cable to the router (this is a micro USB cable that plugs into a type-A USB port on a computer or a USB power adapter that then connect to a wall socket)
1. Connect an ethernet cable from your computer's ethernet port to the LAN port on the mini wireless router that you want to use as an ethernet to wifi bridge
Note: If the computer you are connecting from has wireless turn the wireless off from the network applet
2. Open a web browser and go to https://192.168.10.1
3. Click Advanced and Accept Risk and Continue links/buttons
4. Login
Note: There is no default password set for a non-VPN configured libreCMC router, thus you can just click the Login button to login
5. Go to Network > Interfaces and click the Edit button that is next to the LAN network
6. In the IPv4 address box change 192.168.10.1 to 192.168.8.1
Informational: This above step is to ensure you have a different IP set for your router than typically used by most wireless routers on the market that you might want to connect to. If your upstream router/modem's IP is the same it'll conflict and the bridge will be problematic or not work at all.
7a. Click the Save & Apply button at the bottom of the page
7b. Wait for the Configuration has been rolled back! error message to appear and then click the Apply anyway button
7c. Wait for the Device unreachable! message before continuing to step 8
8. On your computer disconnect from and reconnect your Wired network
9. Open a web browser and go to https://192.168.8.1
10. Click Advanced and Accept Risk and Continue links/buttons
11. Login (again, there is no default password, unless of course you set one already)
12. Go to Network > Wireless
13. Next to where it says Generic MAC80211 802.11bgn (radio0) click the Scan button
14. Click the Join Network button for the wireless network you are attempting to bridge to
15. Enter a passphrase if it is required to connect to the network you are attempting to bridge to
16. Click the Submit button
17. Click the Save & Apply button at the bottom of the page
18. Go to System > Administration and enter a password in the Password and Confirmation boxes
19. Click Save button at the bottom of the page, then the Dismiss button
20. Go to Network > Interfaces and next to where it says Client "Access Point Name You Are Trying to Connect To" click the connect button
Note: It may already be connected in which case there is nothing to do
21. Give it a minute to connect. Next to Client "Access Point Name You Are Trying to Connect To" you will see an IP address once a connection has been established. Example: "IPv4: 192.168.10.117/24".
From your computers network applet click the wired connection to disconnect and then again to reconnect.
22. You should probably also set a password for the routers access point, to do that go to Network > Wireless and click the Edit button next to LibreCMC SSID. Go to the Wireless Security tab under the Interface Configuration section to do this. Change it from No Encryption under where it says Encryption to WPA2-PSK. Then enter a password in the Key box. Click the Save and Apply button. You will need to disconnect from the wireless applet on your computer and reconnect.